Pages

Showing posts with label milk. Show all posts

Wednesday, August 31, 2011

Tres Leches Cake


Hola everyone! Today I bring you a cake I have made many times, and was surprised I hadn’t posted about it yet… it is my tres leches cake! “Tres leches” means “three milks” in Spanish. Its name comes from the fact that this fluffy sponge cake is soaked in three types of milk: condensed, evaporated, and half and half. Then to make something good even better, you top the now very moist cake with some fresh whipped cream! Yumm-O!
This recipe is adapted from my favorite Food Network chef Alton Brown’s  “Good Eats” show. I tried to look for this same recipe on the Food Network website, but could not find it, so there is no link. I got this recipe by recording the Good Eats episode and writing down really fast the recipe as he explained.
Hope you enjoy it!

Tres Leches Cake
~makes one 9x13in cake pan
Ingredients:
6-¾oz cake flour
·         1 tsp baking powder
·         ½ tsp salt
·         4oz (1 stick) unsalted butter, softened
·         8oz sugar
·         5 eggs
·         1 ½ tsp vanilla extract
·         12oz (1 can) evaporated milk
·         14oz (1 can) condensed milk
·         1 cup half & half
Topping:
·         2 cups chilled heavy cream
·         5oz sugar
·         1 tsp vanilla extract

Directions:
Pre-heat the oven to 350F, lightly grease and flour a 9x13in baking pan and set aside. Sift flour, baking powder and salt into a separate bowl. In a stand-up mixer fitted with the paddle attachment, beat the butter on medium-high speed until creamy, then lower speed to about medium and gradually add sugar (about 1 minute). Then add eggs, one at a time, beating until each has dissolved into batter. Add vanilla extract. Add dry ingredients in three installments while beating in low speed. Transfer batter into the prepared baking pan and bake for 20-25min or until it is lightly golden.
Mix all 3 milks (evaporated, condensed and half & half) together in a bowl. Cake must cool on a cooling rack for 30 minutes before adding the milk mixture. Perforate cake with a fork. 
This is where you can enlist some fun help :) 

Add milk mixture into cake pan and wait about 5 minutes until milk has been absorbed by cake. 
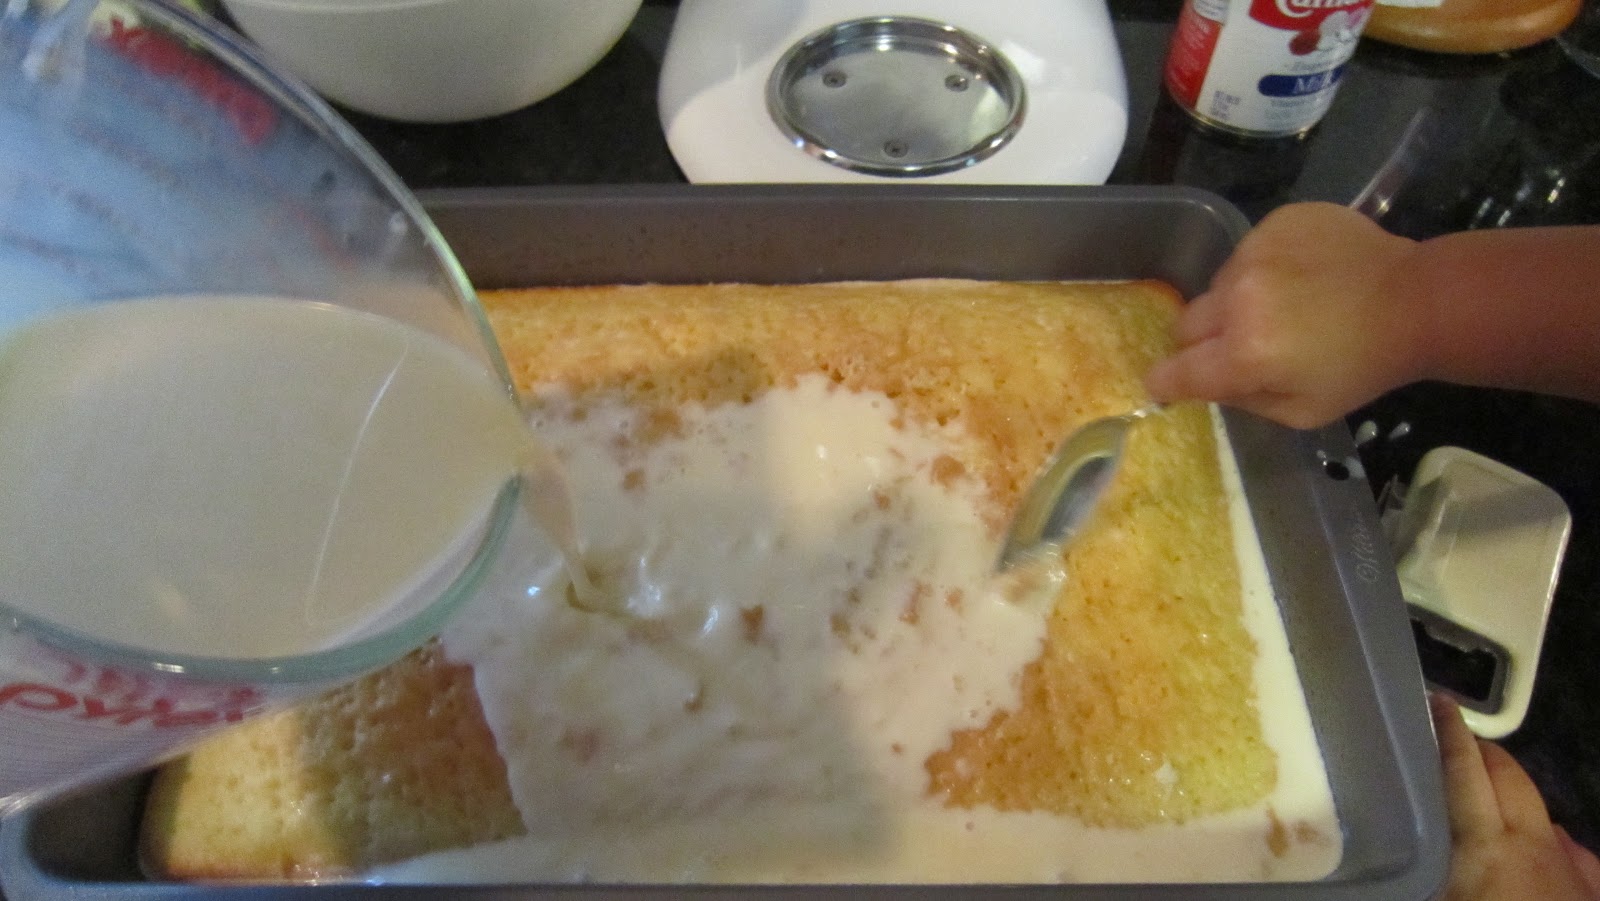
Do you see the spoon trying to make its way into the cake on the right side? 
I'll give you one guess on who it may be...


Place cake in the refrigerator overnight before adding topping.
Before ready to serve, beat heavy cream with sugar and vanilla extract until soft peaks hold themselves. Lather cake with whipped cream and it is ready to serve!
Check out how moist the cake is!!!

Wednesday, July 27, 2011

Homemade Iced Coffee with Godiva Coffee


Hello everyone! Man, is it hot or is it hot? Here in the Midwest, these past few weeks have brought hot and humid days that have had a heat index of over 100F! On a day like that, an iced drink sounds good doesn't it? To start off my day, I usually have some coffee with milk, but recently a hot drink just doesn't sound appealing. However, I've never made an iced coffee drink before, just have had them from coffee shops. Making my own coffee drink sounded so.... hard! Well friends, that is SO NOT the case!!! Let me show you how!!!
First of all, let me introduce the STAR of the drink: coffee! And not just any coffee, amazing French Vanilla Godiva Coffee. The wonderful people at Foodbuzz and Godiva Coffee sent selected food bloggers two 12-oz bags of Godiva Coffee goodness as part of the Foodbuzz Tastemaker Program. I received the French Vanilla and Chocolate Truffle flavors, and let me just say they are both great! My favorite of the two is the French Vanilla, but maybe because I am a vanilla girl myself :) This coffee has the wonderful flavor of French Vanilla, but it is not sweet! This gives you the flexibility of adding your own sweetness to it, if you so desire.
The flavors: French Vanilla and Chocolate Truffle

So once you have your favorite coffee in hand, brew it to your liking. The recommended ratio that was included in the Godiva Coffee bag is about 3 Tbsp of ground coffee to every 12oz of water.
If smells could only be included in a picture... you would be DYING right now! It smells so heavenly!!!

While you "patiently" wait for your coffee to finish brewing, gather the co-stars of your drink: a glass full of ice, and milk. Now, here is where we can be flexible with the ingredients because it really depends on what you like. I like my coffee unsweetened with just milk. I've seen some great ideas at Pioneer Woman with her method of cold brewing. Next time I want to give cold brewing a shot; as people have replied, it takes away the acidity and bitterness of coffee. The downside: it takes longer to brew, so plan ahead if wanting to try this method!


Once the coffee is brewed, add it on to the glass full of ice. I fill my coffee halfway up the glass. Note: the hot coffee does melt some of the ice, which in turn dilutes the coffee down. I didn't mind that, but if you rather not have diluted coffee, you may want to let the coffee cool down completely or make it from the cold brewing method.


Next, add the milk up to the top. I love how the milk swirls in the coffee. So pretty!

Then you mix it all up with a super-duper ultra fancy stirrer, aka chopstick! >.<


Then to finish it up, steal one of your daughter's straws to slurp up all that coffee goodness!  I feel like such a bad mommy, but it was worth having the straw!
By this stage, the whole HOUSE smells like coffee, and you just can't wait another second to drink it all up! I had my iced coffee with my toasted bagel thin with almond butter. And all of this I was able to accomplish BEFORE my daughter woke up! It was the perfect way to start my day off from work. :) 


If you want to try Godiva Coffee (which you should btw!), check out the $2 off coupon they have on their website.